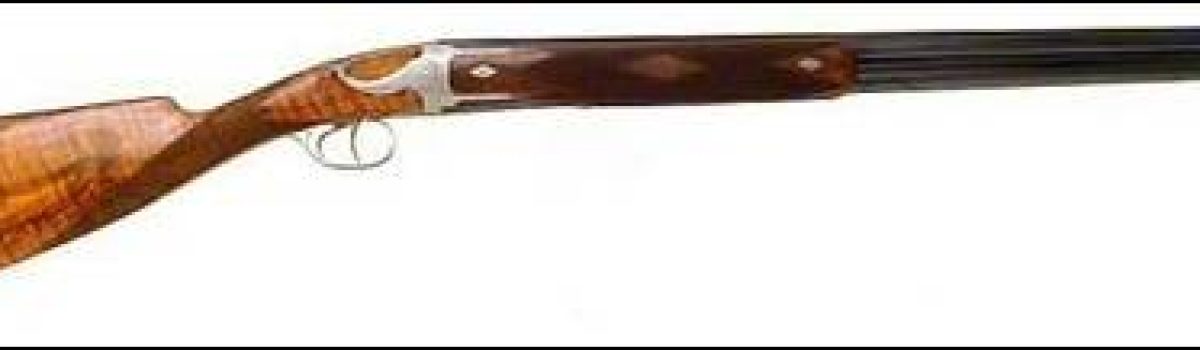
It’s an autumn afternoon in southern New Jersey and I’m in a luxurious tent browsing the best shotguns, when something different, beautiful, stunning catches my attention.
Shotgun Lust
Read More
There are two challenges to finding a great shotgun — fit and suitability.
The shotguns section of Shotgun Life is dedicated to helping you recognize the perfect shotgun (that you’ll want to keep for the rest of your life, and then hand down to your family for generations to come.)
For some people, finding a great shotgun is simply love at first sight. For others, a great shotgun grows on them — and they find themselves down in the basement cleaning it for absolutely no other reason than just to be in its company.
But for every shotgun owner who falls in love with their pride-and-joy, there are teams of engineers and craftsmen toiling away behind the scenes to bring your gun to fruition.
As you’ll see, shotguns are generally designed for a particular sport. Some shotguns have composite stocks and fore-ends to withstand the travails of duck hunting. Then there are single-shot trap guns with high ribs that help you intercept rising targets. And skeet shooters find that their beavertail fore-end is particularly adept at bringing about a smooth, quick swing.
So let the search begin. Here is what you’ll find in our shotgun section…
It’s an autumn afternoon in southern New Jersey and I’m in a luxurious tent browsing the best shotguns, when something different, beautiful, stunning catches my attention.
First the black lab shows up at the door, then the gunsmith, who escorts me through the utilitarian building into a workshop where the president of shotgun maker Caesar Guerini, Wes Lang, has a file in hand working on a customer’s barrel.
In this third and final installment, Michael Sabbeth takes us where few visitors have ever been: Beretta’s seminal 15th century Ome forging house. This is where the company still makes Damascus barrels and accessories. Afterwards, Michael takes us on a tour of Beretta’s premium wineries.
In this second installment of our three-part series, Michael Sabbeth gives us an “X-ray in words” of Beretta’s SV 10 fine shotguns (while capturing that Beretta magic).
In this first of a three-part series, we arrive at the Beretta headquarters in Italy, where Michael Sabbeth queues up his story about the exceptional SO 10 with a brief company history. See first hand why Franco Beretta told Michael “The SO 10 is the highest expression of the Beretta spirit.”
“Call this a tangled web with a happy ending, a story that unfolds like the plot of a Russian novel toward a conclusion in which one of the most venerable Belgian gunmakers and the most venerable American gunmaker undergo a renaissance and in the process bring back to life one of the more visionary guns of the twentieth century - invented by a Belgian maker whose relative obscurity belies his genius.”
— Michael McIntoshA new tradition started in the fabled chronicles of the shotgun sports.
The first Southern Side by Side Fall Classic took place over three days at the Back Woods Quail Club in Georgetown, South Carolina — with a spectacular pheasant tower shoot as the day-before opener.
At the helm of the new event was the steady hand of Bill Kempffer, the guiding force behind the Southern Side by Side Spring Classic held the past nine years every April at his Deep River Sporting Clays and Shooting School in Sanford, North Carolina.
Robert James pulls no punches: “I’m really upset with the shooting industry, including myself,” he says.
What could possibly rile the likes of Mr. James, a 75-year-old master stock maker?
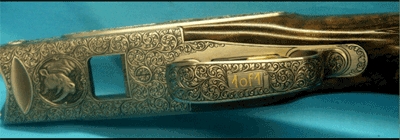
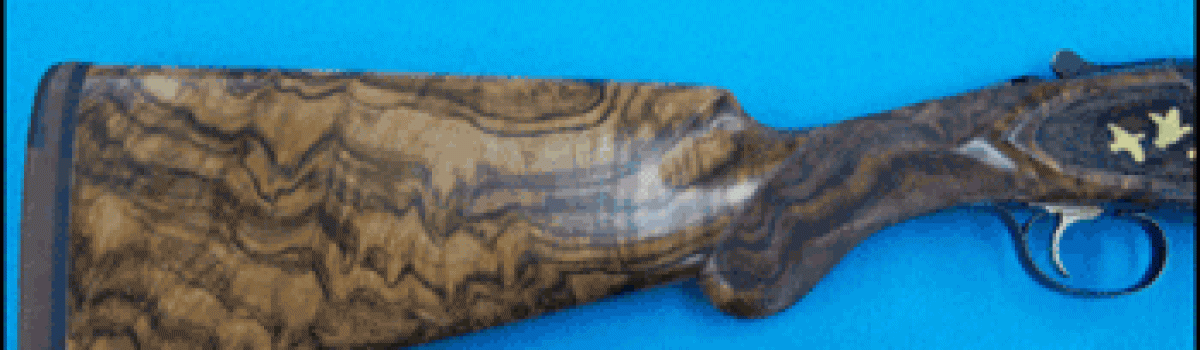
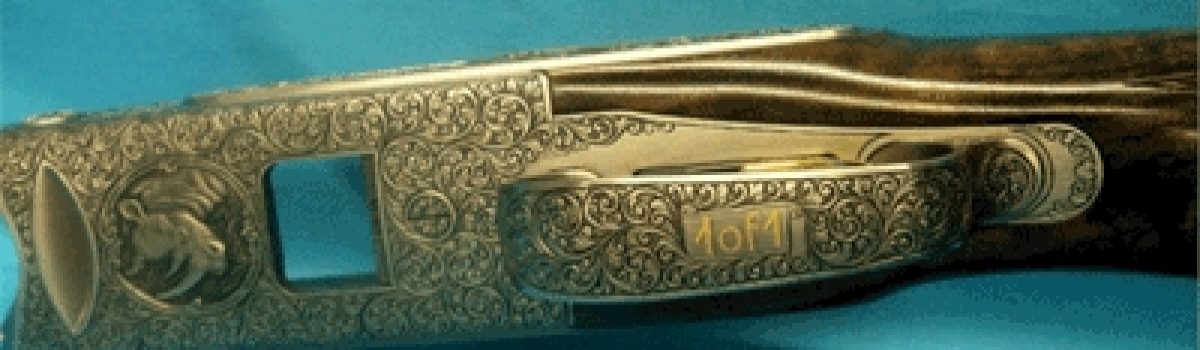
At $50,200 this custom Blaser shotgun may be the most expensive F3 ever produced by the company.
When you consider the top F3 Imperial lists for nearly $29,000, this custom F3, which we call One-of-One because of its trigger-guard inscription, becomes worthy of recognition.
By Irwin Greenstein
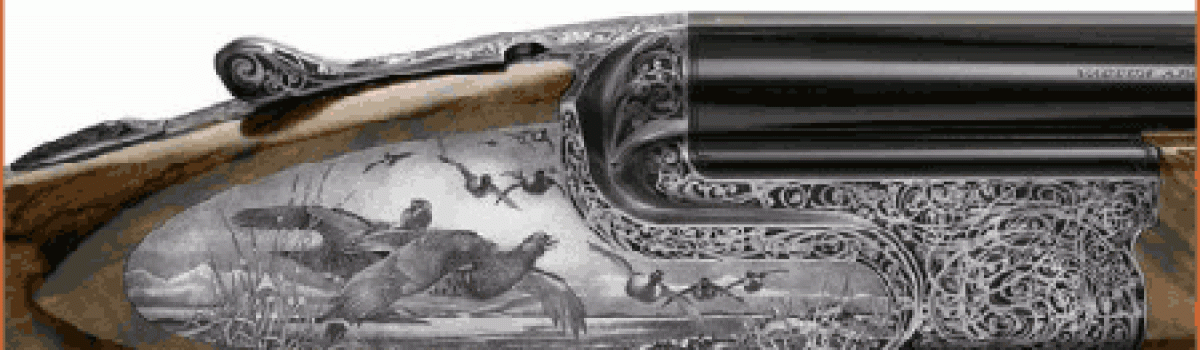
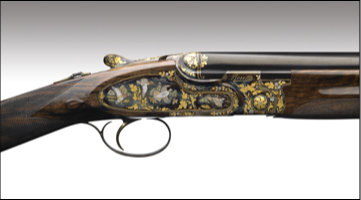
Meet Tullio Fabbri, shotgun maker to the stars.
His clients include director Steven Spielberg, actor Tom Selleck, rocker Eric Clapton and writer-director John Milus.
“A lot of very, very wealthy people in the public eye are Fabbri owners,” noted Mike Burnett, manager of Dewings Fly & Gun Shop in West Palm, Florida, the only authorized Fabbri dealer in the world.
That’s because Fabbri shotguns are recognized as the pinnacle of shotgun achievement. Fabbris are technically perfect, and with their stunning Renaissance and fantasy-style engravings are truly “functional artwork,” said Mr. Burnett.
A Matched Pair for $395,000
Today you can purchase a matched pair of new 12-gauge Fabbris selling for a cool $395,000 on the Dewings web site (simply click on the “Add to Cart” button). The starting price for a new Fabbri is $100,000 — and the waiting list can be up to five, very long years for a bespoke shotgun.
You can of course sidestep the queue and find yourself a previously owned Fabbri. Even then, you can expect to pay $60,000 to $240,000.
Or you can talk with Mr. Burnett. He has reserved time with the engravers and has several Fabbris in the pipeline whose stocks he could custom fit during production. In that case, your wait would be approximately 15 months. If you can accommodate an off-the-rack Fabbri, Mr. Burnett had six in his store as of this writing — among the largest retail inventories of Fabbris anywhere.
The Fabbri Vision
The scarcity, quality and star-power of Fabbris elevates them into the same rarefied universe as the British legends: Purdy, Holland & Holland and Boss. Yet while these institutions have been making shotguns for hundreds of years, Mr. Fabbri’s father, Ivo, started the firm in 1965. The remarkable trajectory of Fabbri is a testament to the craftsmanship and vision that catapulted this tiny shotgun company straight to the top.
So what is the secret to a Fabbri shotgun?
Mr. Fabbri was kind enough to spend about 30 minutes on the phone with us from Italy, to explain the philosophy of the company.
“We have to use anything we can afford to do our job better,” he said. “The design and mechanics of our guns change according to new technology.”
The payoff, according to Mr. Burnett is “The details. A Fabbri gun is absolutely perfect. Not a flaw, not a burr, not anything that would cause that gun mechanical failure. They are mechanically perfect, and as close to perfection in an over-and-under shotgun there is.”
Only 30 Fabbris per Year
As a matter of course, Fabbri has been at the forefront of computerization and advanced manufacturing — an approach that some critics judge as extreme when you consider that the business employs only 16 people who make approximately 30 shotguns per year.
For example, he will use one of these $10-million machines to make a single screw from scratch, explained Mr. Burnett.
“A lot of people don’t appreciate the effort we put into our shotguns,” Mr. Fabbri said. “We keep working very hard to make improvements. The design of the gun is alive — it’s a laboratory for people who really want the best.”
Like a Silicon Valley Clean Room
In his quest, Mr. Fabbri broke ground in 2004 on a new facility that could rival the semiconductor clean rooms of Silicon Valley — a place he knows quite well from his frequent visits to test and try new equipment for his shop.
Fabbri’s 50,000-square-foot factory is climate controlled. It uses 3-D software for design and manufacturing — similar to what the big car makers employ to see renditions of parts and designs in 360º before committing them to production.
Laser-Welded Barrels
Mr. Fabbri has opted to laser-weld the barrels for enhanced precision. The sears in the locks are coated with a diamond dust finish for durability. Materials for making a Fabbri shotgun include titanium alloys and stainless steel for strength and agility. All 150 individual parts of a shotgun are manufactured in the Fabbri workshop — an entire shotgun completing a rigorous 1,500 production steps.
Unlike his pricy British counterparts, Mr. Fabbri is unapologetic that his exquisite over-under shotguns are machine-made. In fact, he believes it’s the best way to make the best possible shotguns.
“We make a 12-gauge that weighs like a 20,” he said. “It’s perfectly balanced. You can’t do that with a file, anvil and drill.”
Fabbri is still blazing a path set in the 16th century of the Val Trompia region of Italy, where the company is located.
The Craftsmen of Val Trompia
Val Trompia is reknown for its Italian craftsmen who have been plying their weaponry skills since Bartolomeo Beretta started making barrels for the arquebus, a heavy matchlock gun favored by kings and popes.
The narrow valley of Val Trompia runs through the Columbine Mountains. The region is rich in high-grade iron ore and timber that fueled the furnaces and fire pits of the earliest artisans. The Mella River which flows through the valley supplied water and hydro power.
This rustic area has been at the leading edge of weapons development for centuries. It is home to Beretta, Franchi and an astonishing concentration of gun-making expertise.
The raw materials of the mountains enabled the Berettas to work the small fires that shaped rough plates heated and wrapped around steel mandrels. It marked the beginning of the fine art of welding the seam along the length of the barrel by hammering the overlapping edges together.
The Brescian Style
Over the centuries, magnificent guns and armor of Val Trompia were manufactured with intricate embellishments chiseled into their design. It came to be referred to as the Brescian style — in acknowledgement of the nearby industrial hub of Brescia.
Val Trompia was relied upon to keep Napoleon’s Grand Army in guns. Almost 40,000 muskets were produced annually until Napoleon was brought to his knees in 1815.
Today, the Val Trompia region is a Mecca for engravers. This ancient mountain region is now home of Sabbati, Pedretti, Torcoli and Pedersoli. How much are collectors willing to pay for Fabbris engraved by these masters? Well, that $395,000 matched pair on the Dewings web site was engraved by the legendary Mr. Pedersoli. An engraving by Mr. Perdersoli can easily add $50,000 or more to the price of a base, $100,000 Fabbri, Mr. Burnett told us.
That’s why it’s hard to believe that the Fabbri phenomenon could have happened anyplace else in Italy.
An Italian Feast of Shotgun Makers
The Brescia Consortium of Arms Manufacturers touts over 30 world-class shotgun manufacturers plus more than 40 subcontractors — the artisans who specialize in barrels, triggers, stocks, engraving and other components that are scrupulously manufactured.
Go down the list of shotgun makers in the consortium and you’ll see Italian legends such as Pedersoli, F.A.I.R., Famars, Piotti, Rizzini, Zoli and others. And it is very similar to the concentration of talent that you find in Silicon Valley where tradition, genius and proximity give rise to a hotbed of innovation.
When you visit Val Trompia, it seems like every Italian gun maker in the country is housed here.
Now, when you think of the specialization that marks so many craftsmen in the area, Mr. Fabbri has taken that 16th century craftsmanship into the space age.
As Mr. Burnett explains, “Basically when you buy a Fabbri you’re paying for the labor. Tullio makes every part in house.”
The Maestros
Mr. Fabbri deftly walks the high wire that spans digital manufacturing and old-world craftsmanship. Ask him who engraves his shotguns, and you’ll get a Who’s Who of Italian Maestros…Angelo Galeazzi, Gianfranco Pedersoli and Manrico Torcoli (the father of the fantasy style of engraving), among others.Mr. Burnett said his customers buy Fabbris for different reasons, but mostly they see these shotgun masterpieces as investments. “They’re not going to lose money — they’re so sought after. You could probably make 10% year over year on a Fabbri.”
Join an elite group of readers who receive their FREE e-letter every week from Shotgun Life. These readers gain a competitive advantage from the valuable advice delivered directly to their inbox. You'll discover ways to improve your shooting, learn about the best new products and how to easily maintain your shotgun so it's always reliable. If you strive to be a better shooter, then our FREE e-letters are for you.
Shotgun Life is the first online magazine devoted to the great people who participate in the shotgun sports.
Our goal is to provide you with the best coverage in wing and clays shooting. That includes places to shoot, ways to improve your shooting and the latest new products. Everything you need to know about the shotgun sports is a mouse-click away.
Irwin Greenstein
Publisher
Shotgun Life
PO Box 6423
Thomasville, GA 31758
Phone: 229-236-1632